Ingredients for Successful Embroidery: A Comprehensive Guide
Embroidery is both an art and a science, requiring the right tools, techniques, and materials to achieve the best results. Whether you're a seasoned professional or a beginner, understanding the key ingredients for successful embroidery can enhance your projects and streamline your workflow. Here’s a modern and detailed guide to help you master the essentials of embroidery.
Embroidery Hooping Made EASY with the All In 1 Hooper Pro Starter Kit.
The All In 1 Hooper Pro is a patented tool designed to make hooping easier and more precise. This innovation, brought to you by TEX INC., is a game-changer for embroidery enthusiasts. Here’s why it’s a must-have:
Saves Space, Time & Money!
Introducing the All in 1 Hooper Pro Starter Kit Part # 2024-ALLIN1PROSK
- This starter kit streamlines the ordering process with just one part number, no matter the customer’s machine brand or hoop size. It is compatible with all tubular hoops, including square, round, oval, and magnetic hoops. One device does it all!
Included in the ALL in 1 Hooper Pro Starter Kit:
- Main Boards: Sleeve/Cap, Infant, Youth, Adult, Ext XL boards
- Leveler Pro (quick change for small hoops)
- Leveler Pro XL (quick change for large hoops)
- Sleeve Board Pro (for hard -to-hoop items and small hoops)
- Bracket sets: square, round, oval and magnetic hoops
For more details, visit All In 1 Hooper and TEX INC.
Key Components of Successful Embroidery
- Hooping:
- Precision: Ensure the fabric is taut and properly aligned in the hoop to prevent shifting during embroidery.
- Tools: Use high-quality hoops and the All In 1 Hooper to achieve consistent results.
- Placement:
- Marking: Use water-soluble markers or chalk to outline the area to be embroidered.
- Templates: Leverage templates to ensure uniform placement across multiple items.
- Embroidery Specifics:
- Thread Selection: Choose threads that complement your fabric and design.
- Stitch Density: Adjust stitch density according to the fabric type to avoid puckering or loose stitches.
- Backing and Stabilizers: Use appropriate stabilizers to provide extra support to the fabric during embroidery.
Tips for Enhancing Your Embroidery Projects
- Preparation: Always pre-wash and iron your fabric before starting your embroidery project.
- Test Runs: Perform test runs on a similar fabric to fine-tune your machine settings.
- Maintenance: Regularly clean and maintain your embroidery machine to ensure optimal performance.
Thanks to Stitches Magazine
We extend our gratitude to Stitches Magazine for providing valuable insights and articles that contribute to this guide. Their expertise helps in keeping embroidery professionals informed and updated with industry trends and techniques.
About TEX INC.
TEX INC. is a leader in embroidery innovation, continuously developing products that enhance the embroidery process. With a commitment to quality and innovation, TEX INC. provides tools and solutions that cater to both beginners and professionals in the embroidery industry.
For more information, visit TEX INC.
Contact Us
For inquiries or more information about our products, feel free to contact us:
- Website: TEX INC
- Phone: [480-375-1844]
- Email: [sal@tex-inc.com]
Mastering the art of embroidery requires the right tools, techniques, and a commitment to continuous learning. By incorporating these ingredients into your workflow, you can achieve exceptional embroidery results every time. Happy stitching!
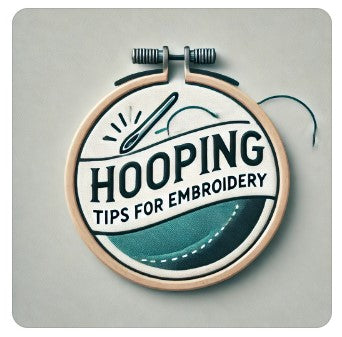
Understanding Hooping: Essential Tips for Perfect Embroidery
Mastering the art of hooping is a fundamental skill for achieving flawless embroidery results. Proper hooping ensures that the fabric remains taut and in place during the stitching process, which is crucial for both machine and hand embroidery. In this guide, we’ll delve into the essentials of hooping and provide practical tips to enhance your embroidery projects.
Why Hooping Matters
Hooping is the process of securing the fabric in an embroidery hoop, which holds it tightly to prevent shifting and puckering. This stability is vital for maintaining the integrity of your design and ensuring precise stitching. Whether you’re a novice or an experienced embroiderer, understanding the nuances of hooping can significantly impact the quality of your work.
Types of Hoops
- Traditional Hoops:
- Made of wood or plastic, traditional hoops are commonly used for hand embroidery.
- Available in various sizes, they consist of two rings that clamp the fabric securely.
- Spring Hoops:
- Spring hoops have a metal ring and a spring mechanism that holds the fabric tightly.
- Ideal for small projects and detailed work.
- Machine Embroidery Hoops:
- Designed specifically for use with embroidery machines.
- These hoops are essential for keeping the fabric stable as the machine stitches the design.
Steps for Perfect Hooping
- Choose the Right Hoop:
- Select a hoop that suits the size and type of your project. The fabric should extend beyond the hoop’s edges for better tension.
- Prepare the Fabric:
- Pre-wash and iron the fabric to remove wrinkles and shrinkage. This step ensures that the fabric lies flat in the hoop.
- Position the Fabric:
- Place the fabric over the inner hoop, ensuring it is centered and straight. Align any design markings with the hoop’s center.
- Tighten the Hoop:
- Place the outer hoop over the fabric and press down firmly. Tighten the screw or spring mechanism to secure the fabric.
- Check the fabric’s tension by gently tugging it. It should be taut but not stretched to the point of distortion.
- Test the Tension:
- Ensure the fabric is evenly tensioned across the hoop. Uneven tension can lead to puckering and uneven stitches.
- Secure the Stabilizer:
- Use a stabilizer to provide additional support to the fabric. Cutaway, tear-away, and water-soluble stabilizers are common options, each suitable for different fabric types and designs.
Advanced Hooping Tips
- Use a Hooping Station:
- A hooping station can help maintain consistent tension and alignment, especially for large or complex designs. www.allin1hooper.com
- Hoopless Embroidery:
- For delicate fabrics, consider hoopless embroidery techniques. Use sticky stabilizers or basting stitches to secure the fabric without hooping it directly.
- Regular Maintenance:
- Keep your hoops clean and in good condition. Check for any warping or damage that could affect their performance.
- Practice and Patience:
- Perfect hooping comes with practice. Take your time to ensure the fabric is positioned and tensioned correctly before starting your embroidery.
Conclusion
Hooping is a crucial step in the embroidery process that can make or break the outcome of your project. By following these tips and techniques, you can achieve perfect hooping and elevate the quality of your embroidery. Remember, practice makes perfect, and with time, you’ll develop the skills needed for flawless hooping every time.
By mastering the art of hooping, you can ensure that your embroidery projects are always of the highest quality, with crisp, precise designs and no unwanted puckering or distortion. Happy stitching!
Hooping 101: Essential Tips for Perfect Embroidery
Mastering the art of hooping is a fundamental skill for achieving flawless embroidery results. Proper hooping ensures that the fabric remains taut and in place during the stitching process, which is crucial for both machine and hand embroidery. Here’s a detailed guide to help you understand the essentials of hooping and enhance your embroidery projects.
Why Hooping Matters
Hooping is the process of securing the fabric in an embroidery hoop, holding it tightly to prevent shifting and puckering. This stability is vital for maintaining the integrity of your design and ensuring precise stitching. Whether you’re a novice or an experienced embroiderer, understanding the nuances of hooping can significantly impact the quality of your work.
Types of Hoops
- Traditional Hoops:
- Made of wood or plastic, traditional hoops are commonly used for hand embroidery.
- Available in various sizes, they consist of two rings that clamp the fabric securely.
- Spring Hoops:
- Spring hoops have a metal ring and a spring mechanism that holds the fabric tightly.
- Ideal for small projects and detailed work.
- Machine Embroidery Hoops:
- Designed specifically for use with embroidery machines.
- These hoops are essential for keeping the fabric stable as the machine stitches the design.
Steps for Perfect Hooping
- Choose the Right Hoop:
- Select a hoop that suits the size and type of your project. The fabric should extend beyond the hoop’s edges for better tension.
- Prepare the Fabric:
- Pre-wash and iron the fabric to remove wrinkles and shrinkage. This step ensures that the fabric lies flat in the hoop.
- Position the Fabric:
- Place the fabric over the inner hoop, ensuring it is centered and straight. Align any design markings with the hoop’s center.
- Tighten the Hoop:
- Place the outer hoop over the fabric and press down firmly. Tighten the screw or spring mechanism to secure the fabric.
- Check the fabric’s tension by gently tugging it. It should be taught but not stretched to the point of distortion.
- Test the Tension:
- Ensure the fabric is evenly tensioned across the hoop. Uneven tension can lead to puckering and uneven stitches.
- Secure the Stabilizer:
- Use a stabilizer to provide additional support to the fabric. Cutaway, tear-away, and water-soluble stabilizers are common options, each suitable for different fabric types and designs.
Advanced Hooping Tips
- Use a Hooping Station:
- A hooping station can help maintain consistent tension and alignment, especially for large or complex designs.
- Hoopless Embroidery:
- For delicate fabrics, consider hoopless embroidery techniques. Use sticky stabilizers or basting stitches to secure the fabric without hooping it directly.
- Regular Maintenance:
- Keep your hoops clean and in good condition. Check for any warping or damage that could affect their performance.
- Practice and Patience:
- Perfect hooping comes with practice. Take your time to ensure the fabric is positioned and tensioned correctly before starting your embroidery.
Conclusion
Hooping is a crucial step in the embroidery process that can make or break the final outcome of your project. By following these tips and techniques, you can achieve perfect hooping and elevate the quality of your embroidery. Remember, practice makes perfect, and with time, you’ll develop the skills needed for flawless hooping every time.
By mastering the art of hooping, you can ensure that your embroidery projects are always of the highest quality, with crisp, precise designs and no unwanted puckering or distortion. Happy stitching!
Polo Shirts: Perfecting Your Embroidery
Polo shirts are a staple in both casual and professional wardrobes, making them a popular choice for embroidery. Whether for corporate branding, sports teams, or personal use, achieving perfect embroidery on polo shirts involves several key steps. Here's a guide to help you get the best results.
Preparing Your Polo Shirt
- Choose Quality Fabric:
- Opt for high-quality polo shirts made of cotton or a cotton blend for the best embroidery results. Avoid fabrics that are too thin or stretchy.
- Pre-Wash the Garment:
- Pre-wash and iron the polo shirt to remove any shrinkage and wrinkles. This ensures the fabric is flat and ready for embroidery.
Selecting the Right Design
- Digitize Your Design:
- Ensure your design is digitized properly for embroidery. Use software that converts your design into a format readable by embroidery machines.
- Size and Placement:
- Choose the right size for your design. The left chest is the most common placement for logos and names on polo shirts.
Hooping the Polo Shirt
- Use the Right Hoop:
- Select a hoop size that fits the design and the area to be embroidered. Make sure the hoop is clean and in good condition.
- Align the Fabric:
- Position the polo shirt in the hoop, ensuring the fabric is flat and the design area is centered. Use alignment tools or markers to help with precision.
- Tighten the Hoop:
- Place the outer hoop over the fabric and tighten it. Ensure the fabric is taut but not overly stretched to avoid puckering.
Embroidering the Polo Shirt
- Stabilize the Fabric:
- Use a stabilizer on the back of the fabric to provide support during embroidery. Cutaway stabilizers are often preferred for polo shirts due to their strength.
- Test Your Settings:
- Perform a test run on a similar fabric to fine-tune the machine settings, such as tension, speed, and thread type.
- Monitor the Process:
- Keep an eye on the embroidery process to ensure everything is running smoothly. Make adjustments as necessary.
Finishing Touches
- Remove Excess Stabilizer:
- After embroidery, carefully trim away the excess stabilizer from the back of the fabric.
- Press the Embroidery:
- Gently press the embroidered area with an iron to flatten any raised stitches and give the design a polished look.
Common Issues and Solutions
- Puckering:
- Ensure proper hooping and use a suitable stabilizer to prevent puckering. Check the tension settings on your embroidery machine.
- Misalignment:
- Double-check the alignment of the fabric and the positioning of the design before starting the embroidery. Use alignment tools for accuracy.
- Thread Breakage:
- Use high-quality threads and needles, and ensure the machine is properly maintained. Adjust the tension settings as needed.
Conclusion
Embroidery on polo shirts can elevate their appearance and make them stand out. By following these steps, you can achieve professional and high-quality embroidery results. Whether for personal projects or business purposes, mastering the embroidery process on polo shirts will ensure your designs are always impressive and durable.
By focusing on preparation, proper hooping, and attention to detail, you can create beautifully embroidered polo shirts that are both stylish and long-lasting. Happy stitching!